In this article, we will review the similar tools and functions provided by photo editing software that may cause some confusion. Some of these tools may appear similar yet function differently, while others will perform the same task but at different capacities.
You can explore an extensive list of photography terms and definitions in our separate article.
Table of contents
- Exposure and Brightness
- Levels and Curves
- Cloning and Healing
- Clarity and Structure/Texture
- Opacity and Fill/Flow
- Saturation and Vibrance
- Gradient and Gradient Map
- Grain and Noise
Exposure and Brightness
In editing software, the exposure parameter helps in controlling the overall light information in a frame. It is best used to shift the luminosity value of an image or to attempt to recover details in highlights and shadows. Its effects are similar to the exposure compensation setting of a digital camera.
Increasing this value will lighten all luminance equally by a constant multiplying factor and shift the histogram to the right, which can lead to overblown highlights with loss of detail. Decreasing this value will shift the histogram to the left, darkening the image, and can sometimes help in highlight recovery.
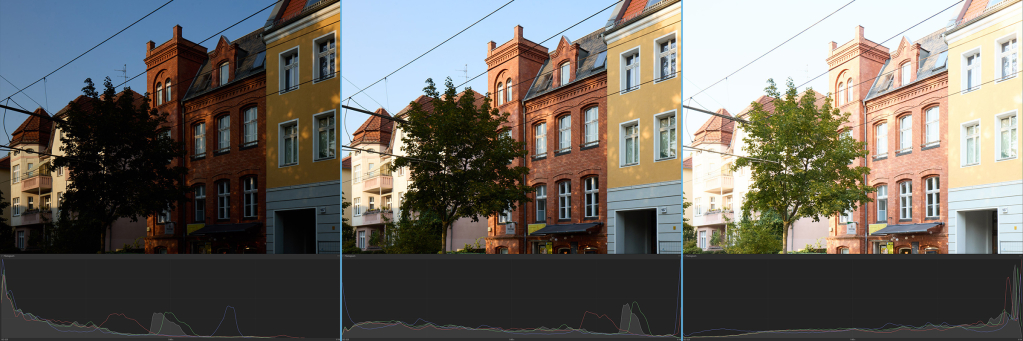
The brightness setting will brighten or darken the image more selectively, focusing mainly on the midtone values. Its effects are less intense than the exposure setting.
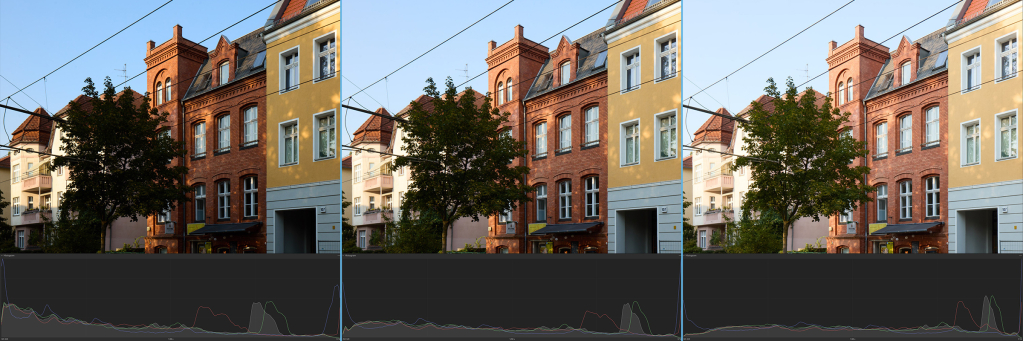
The exposure and brightness settings can be used together, but altering the luminosity of an image will require ulterior contrast and saturation adjustments for a more balanced result.
Levels and Curves
Both tools are a staple in digital image editing and can be used for luminosity and contrast control, which includes raising black points, lowering white points, shifting midtones, modifying the dynamic range and adjusting the color balance when used on individual channels. They use the histogram as a visual guide to provide immediate feedback on applied changes.
Levels provides a more intuitive way of adjusting the above-mentioned settings, offering sliding control points for the most important brightness values. Creating new intermediary points for specific values is not possible. In Capture One sampling tools for the shadow and highlight levels will automatically adjust the corresponding slider in the RGB section, without affecting individual channels.
The Curves tool offers more flexibility, allowing you to add and move any number of points along a diagonal line. The lowest point of the line corresponds to the black point, while the highest point indicates the white point. Moving either of these points to the middle along the x-axis will reduce the dynamic range of the image. Moving an added point will create a curve between it and adjacent points, which means that neighboring tonal values are also affected. When a point is dragged down it will darken the tonal values in that part of the range, while pushing a point up will lighten them.
For both tools, in Photoshop, sampling tools for the black, white and gray (midpoint) points will modify the brightness and contrast of the image without changing the slider position in the RGB section and will automatically adjust the corresponding slider on the individual channels.
When using the Levels or Curves tool, the saturation of the image may also change. Capture One introduced a Luma section for the Curve tool which controls the brightness and contrast of the image without affecting its saturation. In Photoshop, creating an adjustment layer set to the Luminosity blending mode will work similarly.
Cloning and Healing
Cloning is the process of copying pixels from one area to another in order to erase or replace elements in an image. The clone stamp tool is able to copy the exact color and luminosity from the sampled area to the target area. Adjusting the size, orientation, and rotation of the sampled area to better fit the target area is possible through the Clone Source panel.
Changing the blending mode when applying the source pixels may help integrate them more naturally into their surroundings: used on darken or lighten blending modes, with a low opacity or flow, it can help eliminate dirt, dust or moiré without disrupting patterns. If this results in patches of areas with loss of texture, an additional intervention using the Healing Brush can help blend these areas more seamlessly.
Healing is the process of removing or hiding elements by covering the destination area with an integrated and similarly adjusted texture. It differs from the clone stamp in that it automatically pulls information from the pixels surrounding the brush edge to adjust the luminosity and color of the applied pixels.
Apart from the settings available to clone stamp, healing brushes offer a scale of diffusion that ranges from 1 to 7 (1 acts like a hard-edged brush, using a smaller sampling area around the destination – ideal for fine details; 7 is the highest spread of the brush, which will allow for more surrounding pixels to be mixed in – best used for covering broader, less detailed areas).
Used on darken or lighten blending modes, the Healing Brush can help disrupt repeated patterns and create a new motif without compromising the original image texture.
You can read more about object removal tools in Photoshop in our separate article.
Clarity and Structure/Texture
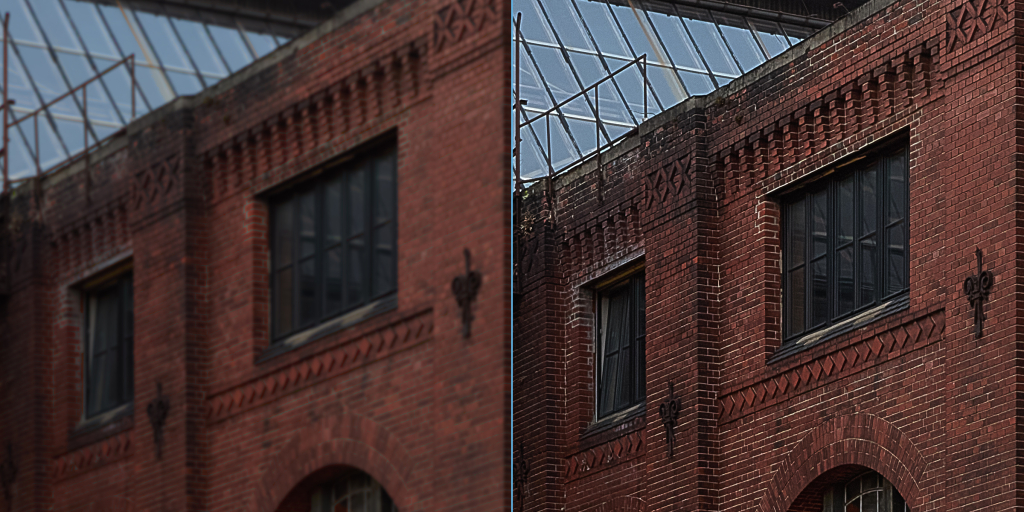
Both functions influence microcontrast, a localized contrast characteristic which primarily affects textures and edges (as opposed to general contrast which describes luminosity differences on larger areas). Capture One uses the Structure slider, while Adobe uses the Texture slider and both work in a similar way.
Clarity primarily affects midtone contrast and can enhance or diffuse certain areas of an image. Adjusting this slider towards either of its endpoints will affect the overall tone of the image and introduce either an exaggerated soft or harsh look.
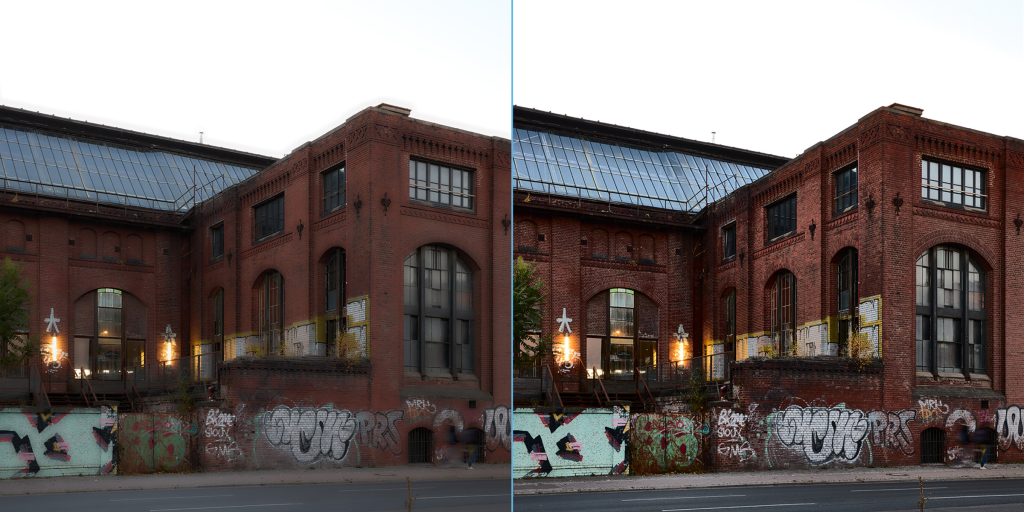
Structure/texture is used for smaller areas and finer details, prioritizing edges and patterns such as foliage, fabric, construction materials, etc. Adjusting this slider will only enhance detail in high-frequency areas, specifically where transitions have only slightly different tonal values and thus, not changing the overall brightness or saturation appearance of the image. Increasing the value too much will result in digital artifacts and halos around edges, while decreasing the value too much will introduce blur.
Opacity and Fill/Flow
Opacity determines the level of transparency of a brush stroke or a layer.
For brushes and clone stamps, painting over an area with 50% opacity once (without releasing the mouse or lifting the pen) will only reveal half of the visible color or stamped pixels. Painting over the area a few more times (while releasing the mouse or lifting the pen between strokes) will build up the effect, eventually reaching full opacity. Before reaching 100% visibility any previous strokes will remain visible under the new brush marks, which can help in blending and integrating the applied color or cloned pixels more naturally into the surrounding area.
Flow is a term used exclusively for brush tools and determines both the amount of color or copied pixels applied and the speed of application in a single stroke. A higher flow value will allow more paint to be applied quickly, while a lower flow value will restrict the quantity of paint, resulting in a more gradual buildup. Brushing over the same area multiple times, without lifting the pen or releasing the mouse, will create a transition that is smoother in appearance compared to using multiple strokes at low opacity.
For layers, opacity will also adjust the visibility of all blending options added from the Layer Style panel.
Fill is a similar setting which adjusts the visibility of the content of a layer (including shape and text), without affecting strokes and other blending options added from the Layer Style panel. When used together with the so-called 8 special blending modes (Color Burn, Linear Burn, Color Dodge, Linear Dodge (Add), Vivid Light, Linear Light, Hard Mix and Difference) it will behave differently. Unfortunately, Adobe does not provide documentation for the calculations used for these blending modes, but we can assume the algorithm used for the fill setting is forcing these blending modes to apply extra calculations, rendering a different result compared to low opacity layers.
Saturation and Vibrance
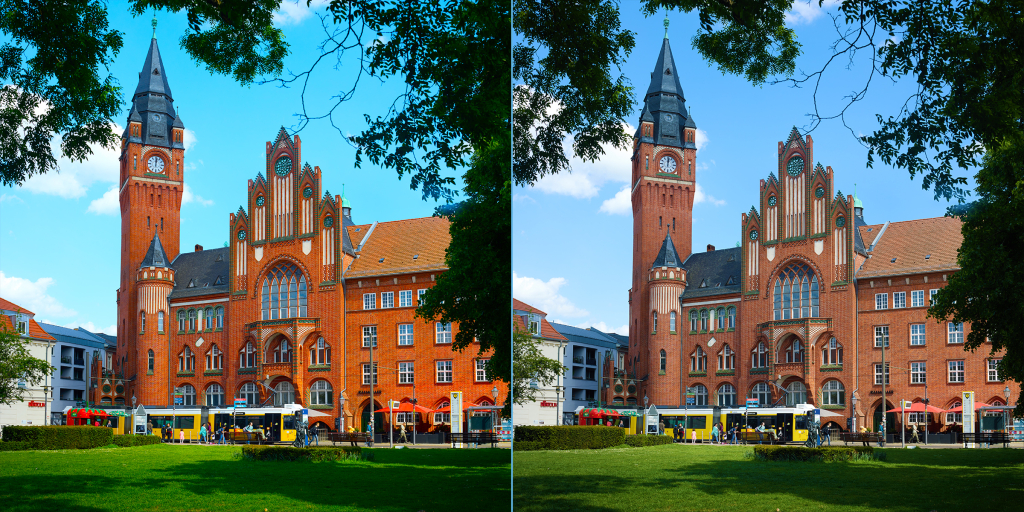
In photo editing, the saturation slider controls the intensity of all colors in an image. Some tools allow selective saturation control, which adjusts the intensity of specific color ranges, without affecting the rest. Increasing the saturation will amplify the intensity and vividness of colors, while decreasing the saturation will move the colors towards monochromatic values (black and white). Increasing the saturation too much will lower the gradual transition levels between neighboring colors and will lead to oversaturation and posterization effects.
In some editing software a vibrance slider is also present, which also enhances or reduces saturation, but selectively affects the muted, less saturated tones in the image, typically in the midtone and shadow range. Decreasing the vibrance value to its lowest point will leave the more saturated colors relatively unaffected, while less saturated colors will be transformed to black and white.
Gradient and Gradient Map
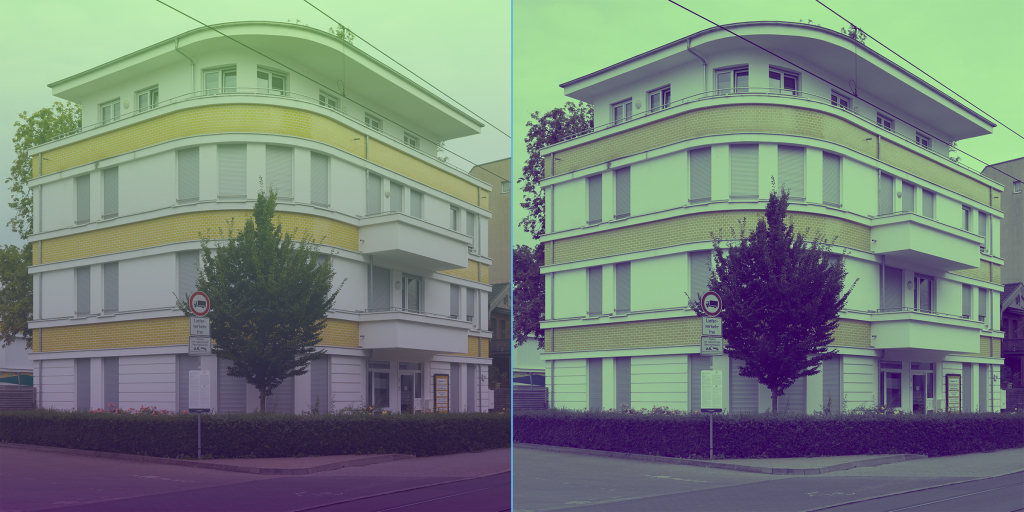
The Gradient tool is used to create a progressive transition between the parameters of a color, a gradual blend between two or multiple colors, or a smoother transition between revealed and hidden pixels of a mask. Different styles (linear, radial, angled, reflected or diamond) will influence its shape and appearance. It has parameters for angle and scale, and applying dithering will create a smoother transition with less banding. Points along the gradient will control the color distribution and it has the option to reverse the end values.
The Gradient Map adjustment layer applies color gradients to an image based on its luminosity. The color on the left end of the gradient will cover the shadows, while the color on the right will replace the highlights. Any midtone values will be covered by the transitional values of the gradient. Switching to different blending modes (such as Overlay or Color) and lowering the opacity is useful for color grading. It is important to note that masks can not be created using this tool.
Grain and Noise
Grain describes a physical characteristic of a film stock, caused by the interaction of the particles of silver halide crystals in the film emulsion with light. This process results in a random optical texture across the image, which is monochromatic and adds a non-uniform visual quality to the image, due to the varied size and distribution of photosensitive materials in the film emulsion. Grain varies in size and appearance between film types and typically high ISO/ASA films have larger, more noticeable grain.
Noise is a result of digital sensor limitations, often appearing as random, colored artifacts across an image. It is typically caused by using high ISO settings or in other situations where the sensor amplifies signals to capture more light, thus introducing visual distortion. Because digital sensor cells are of the same size, noise will appear as pixel-level luminance and color fluctuations, resulting in a different visual appearance than grain.
While noise is not necessarily desired in an image, it can be introduced to reduce banding caused by color transitions or feathered selections, to better integrate edited areas with the entire image, or as a subtle texture overlay to balance tonal values. A quick way to add discrete noise over an image in Photoshop is to create a 50% gray-filled (#808080) layer, adding a low amount of gaussian, monochromatic noise via the Filter menu, as well as a low-value Gaussian Blur filter. Switching this layer between the Overlay, Soft Light and Hard Light blending modes will change the appearance of the result and will help in integrating it better.
Current software and plugins also offer the possibility to simulate film grain on digital images, either by procedurally generating texture maps or overlapping samples derived from actual scanned film stock.