An essential tool for photographers and retouchers, luminosity masks allow you to selectively adjust image parameters. They offer a non-destructive and intuitive approach to control the brightness, contrast and other settings in specific areas of an image.
Table of contents
- Introduction
- An important first step
- The Channels panel
- Lights masks
- Darks masks
- Midtones masks
- Use examples
- Actions and panels
Introduction
Luminosity masks are based on the image brightness values. They are highly detailed, perfectly feathered, and match the image pixel-by-pixel. These masks depict different shades of gray, unlike regular masks that often use only pure black and white pixels. They function the same as any other mask: white and brighter tones reveal details, while black and dark tones conceal them.
They contain almost the same amount of information as a grayscale image. Saving them as Alpha channels within a Photoshop file will significantly increase the project size and may require more processing power, potentially affecting performance on less powerful systems.
Applications of luminosity masks include selective adjustments to highlights, midtones, or shadows; exposure blending; creating complex selections based on brightness; and enhancing local contrast and saturation.
An important first step
Before starting to work with luminosity masks, it is important to adjust your color settings. Open Edit > Color Settings… and change the Gray option under Working Spaces to Gray Gamma 2.2 when working in the sRGB or Adobe RGB color space. If working in the ProPhoto color space, switch the Gray option to Gray Gamma 1.8. Photoshop’s default working space of Dot Gain 20% does not perfectly match the RGB color space, as it was originally created for printing. Although this step won’t affect the colors of the image, it will affect the accuracy of the generated luminosity masks.
The Channels panel
When working in RGB color mode, the Channels panel in Photoshop allows us to view the individual Red, Green, or Blue channels, revealing where each color is present in the image. The topmost channel, called the RGB channel, provides a composite view of all channels, showing the entire image. The names, number, information and order of channels depend on the working color mode.
By ctrl-clicking (cmd-clicking on Mac) or clicking the Load selection from channel button at the bottom of the Channels panel, we can load the selection of any active channel. We can then save the selection as a new channel by clicking the Save selection as channel button or move back to the Layers panel to create a mask from the selection. This selection-based mask is still considered a luminosity mask, as it’s derived from the luminosity values of the image.
To achieve a natural look and create subtle adjustments, we should utilize the soft transitions provided by the overall luminance values of the image, working from the results derived from the composite RGB channel.
However, there are cases where combining individual channels for luminosity masking can be beneficial. For instance, when working with the result of Photoshop’s automated Sky Selection command, combining it with the Blue channel can often yield improved results. This technique can help refine the sky selection, especially in situations where the sky’s color differs significantly from the rest of the image.
Lights masks
Loading the RGB channel as a selection and saving it as a new Alpha Channel, can be used as a base for creating subsequent light masks, as by default it will render the overall brightness of the image. We will call this channel Light_1.
Intersecting this channel with itself, will constrain the visible pixels, focusing the resulting channel on brighter tones than the previous one, making its appearance darker. To achieve this, we ctrl-click (cmd-click on Mac) on Light_1 in the Channels panel, and with the loaded selection we press Ctrl+Alt+Shift (Cmd+Opt+Shift on Mac) and click again on Light_1. The Save selection as channel button will create a new channel, which can be named Light_2.
Repeating the process by intersecting the Light_2 channel with itself, as described above, will result in an even darker channel concentrated on brighter values. This can be continued as long as the resulting channel is not entirely black, with each iteration focusing on a brighter part of the image.
Intersecting the channels incrementally (for example, Light_1 with Light_2) will result in intermediate channels that reveal more than the result of Light_2 intersecting with itself.
We would be able to refine these masks even further. For example, loading a selection from Light_1 and subtracting (Ctrl+Alt+click on Windows, Cmd+Opt+click on Mac) any other generated Light channels will result in a flat channel that displays bright midtones and ignores bright highlights.
Darks masks
Creating masks for shadow adjustments is similar to the steps described in the section about lights masks.
By loading the RGB channel as a selection, inverting it (Ctrl+i on Windows, Cmd+i on Mac) and saving it as a new Alpha Channel, we create a new channel that features all dark parts of the image, that we name Dark_1.
To further constrain the dark values, we can use the same technique of intersecting a channel with itself, as previously done for lights masks. Alternatively, we can duplicate all generated Light channels, invert them, and rename them accordingly for better organization.
The same applies for intersecting the dark channels incrementally, as well as loading selections from Dark_1 and subtracting any other generated Dark channels, which will result in a flat channel that displays dark midtones and ignores dark shadows.
Midtones masks
To create luminosity masks for midtones, first ensure that all the Lights and Darks channels are created and properly named. Create Midtone_1 by selecting the entire image (Ctrl+A on Windows, Cmd+A on Mac). Subtract Light_1 and Dark_1 by clicking on each while holding Ctrl+Alt on Windows or Cmd+Opt on Mac. Then, press the Save selection as channel button to save the new midtone channel.
Midtone_2 is obtained, again, by selecting the entire image and subtracting Light_2 and Dark_2, and so on.
Whenever the Photoshop warning No pixels more than 50% selected appears, it does not mean that the selection has disappeared; it simply indicates that the selection is no longer able to display the marching ants (the moving dots that usually indicate a selection).
Use examples
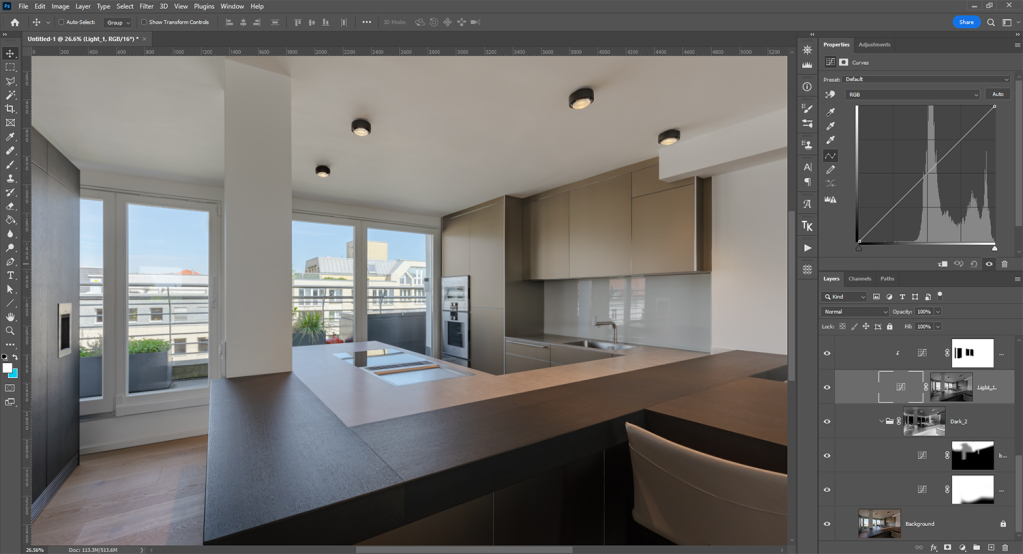
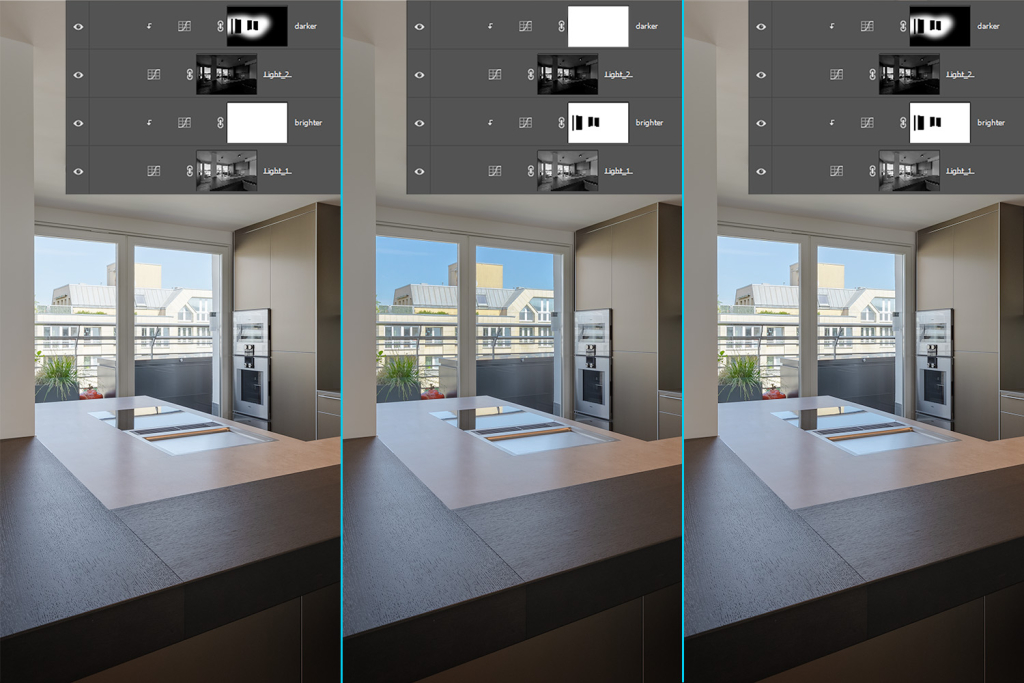
Since creating a luminosity mask takes many steps, the best way to make multiple localized adjustments using the same mask is either by creating a group, apply the luminosity mask on the whole group and add the adjustment within (localizing them by using regular masks on each adjustment) or by replacing the default mask of adjustment layers with the luminosity mask (keeping it on Normal blending mode) and clip any additional adjustments to this layer when editing parts of that luminance level.
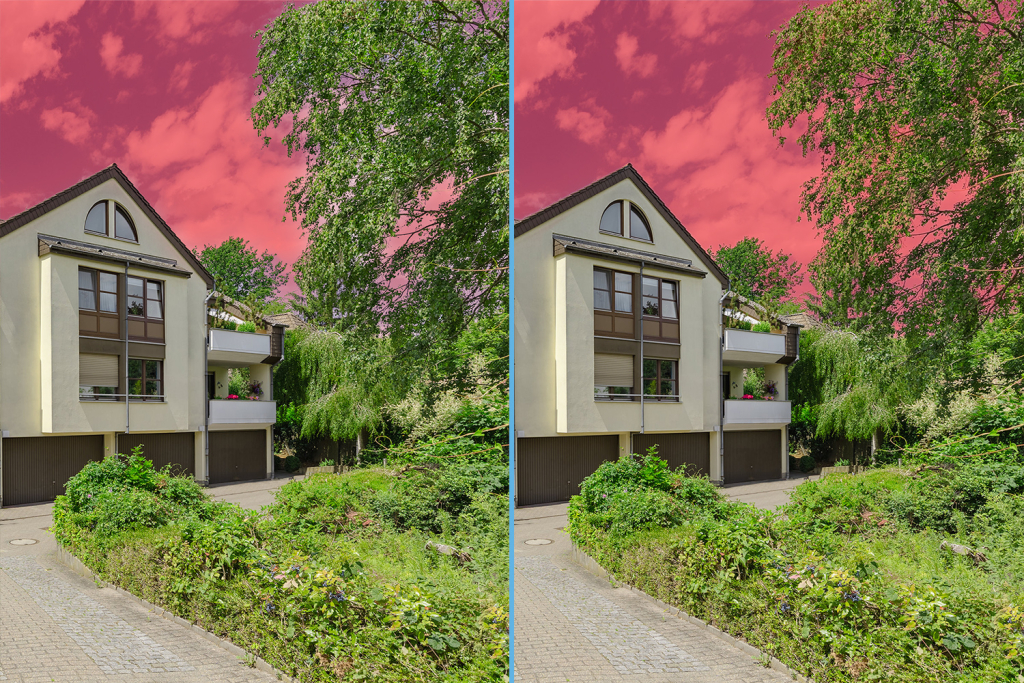
Using a combination of luminosity and regular masks, we can make powerful yet natural looking modifications to enhance certain parts of an image.
Luminosity masks are useful in compositing bracketed images, which allow realistic and subtle modifications.
Actions and panels
Even though automated solutions for luminosity masks exist, it’s very useful to understand how they work. To save time on these tasks, we can create actions that can be applied to any image, or we can choose from a selection of panels designed specifically for this purpose.
Some of the best known panels are TK, Lumenzia, Raya Pro and Lumi32. These tools not only include actions for generating luminosity masks, but offer additional functionalities, such as sharpening options, masks for saturation values and export presets.