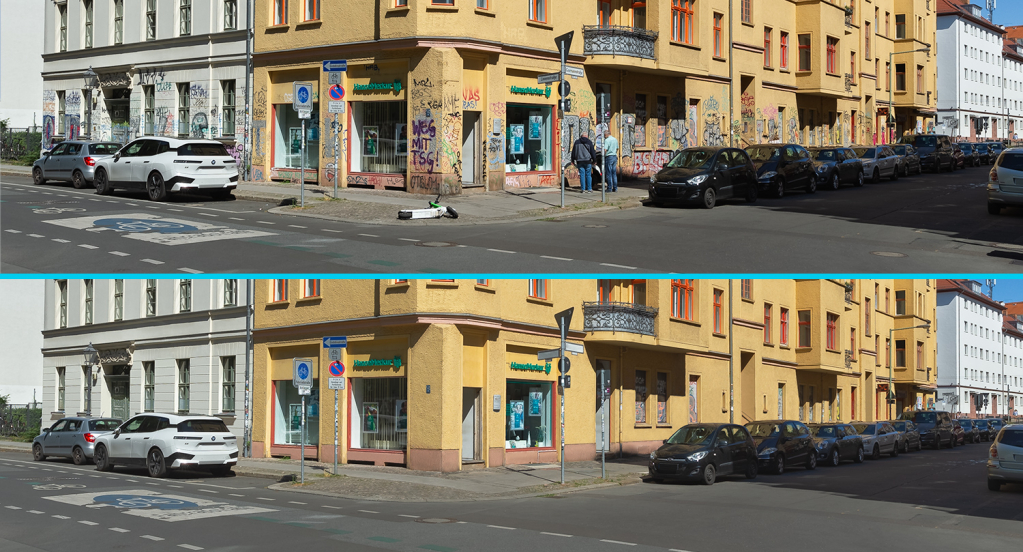
As an advanced imaging software, Adobe Photoshop provides a multitude of tools specifically designed for object manipulation and removal. While AI algorithms evolve and object removal gets more automated, it is still good practice to know how these tools work, as this knowledge allows for more precise and controlled edits, ensuring the highest quality results when automated methods fall short or require manual adjustments.
Table of contents
Generative AI
Adobe’s AI implementation has been controversial, to say the least. Issues range from data harvesting users’ images to an overall lack of transparency toward its community. Adobe also introduced credits, tokens that are expended for every API call of its AI functions, which renew on a monthly basis. When credits are depleted, users must rely on a slower version of the algorithm or purchase additional credits.
As of now, Generative AI offers mostly imperfect outcomes. The Generative Fill usually produces lower-resolution results which are then upscaled. For object removal, it correctly interprets the scene but tends to remove texture. This solution works on low-resolution files, but when zooming in on a larger image, missing details and subpar results become apparent.
Additionally, the AI engine can sometimes misalign elements or even generate entirely inaccurate (hallucinated) results, making manual adjustments necessary for high-quality outcomes.
Content Aware
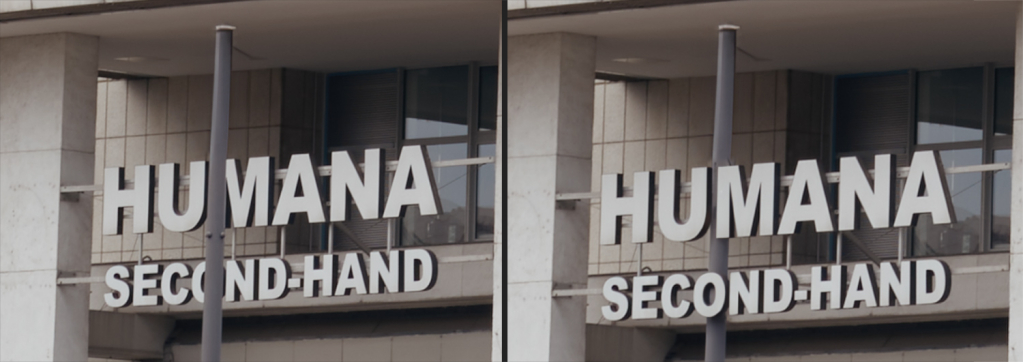
Introduced before the implementation of cloud-computed AI editing, Content Aware (Shift+Backspace on Windows, Shift+Delete on Mac) renders the result on the same layer as the selection by default. This keyboard shortcut only works on rasterized layers and is recommended as an accessible tool for quick object removal.
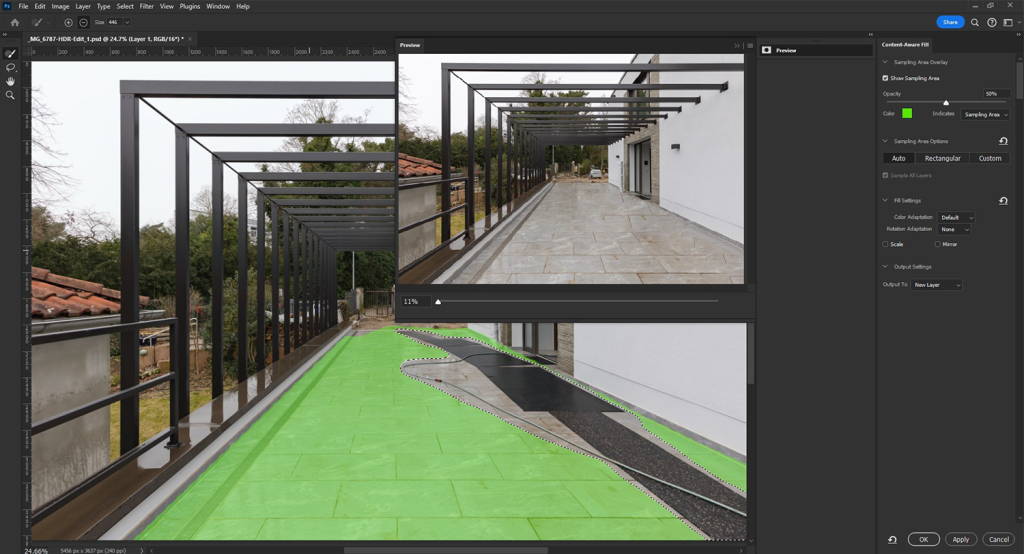
Using this function from the Edit menu opens a user interface that enables the selection of sample areas and the output to the same, a duplicated, or a new layer. Due to the sampling of the image information, it retains textures and details, but sometimes conventional tools need to be used for detailed refinement, similar to the case of Generative AI.
The Content-Aware Move tool, found in the healing tools group, enables freehand selections that can be repositioned in the image. The tool attempts to blend the source with its new destination while filling in the area where the source was previously located. It only works on rasterized layers or by sampling all layers. Only the size of the selection can be adjusted in the Clone Source panel (described in the Clone Stamp section).
The Patch Tool works similarly to the Content-Aware Move tool but doesn’t consider the whole image’s information. If the Destination option is active, dragging and moving a selected area over a different one will copy and blend the selected area into its new position. If the Source option is active, selecting an element and dragging it over another area will erase the originally selected element and replace it. The Patch Tool only works on rasterized layers, as it has no sampling option.
Clone Stamp
The Clone Stamp tool is used to copy a sample and apply it over another area. It doesn’t blend the sampled area into its new location, that means any difference in color and luminosity will be noticeable.
Its use case is dependent on the uniformity of the elements selected for retouching and I would recommend using it together with the Healing Brush.
By using it repeatedly on low opacity and on different blending modes (Darken for bright elements and Lighten for dark ones) it is possible to seamlessly remove distracting elements. If this method produces improperly mixed or results lacking texture, it is possible to correct these using the Healing Brush as an additional adjustment.
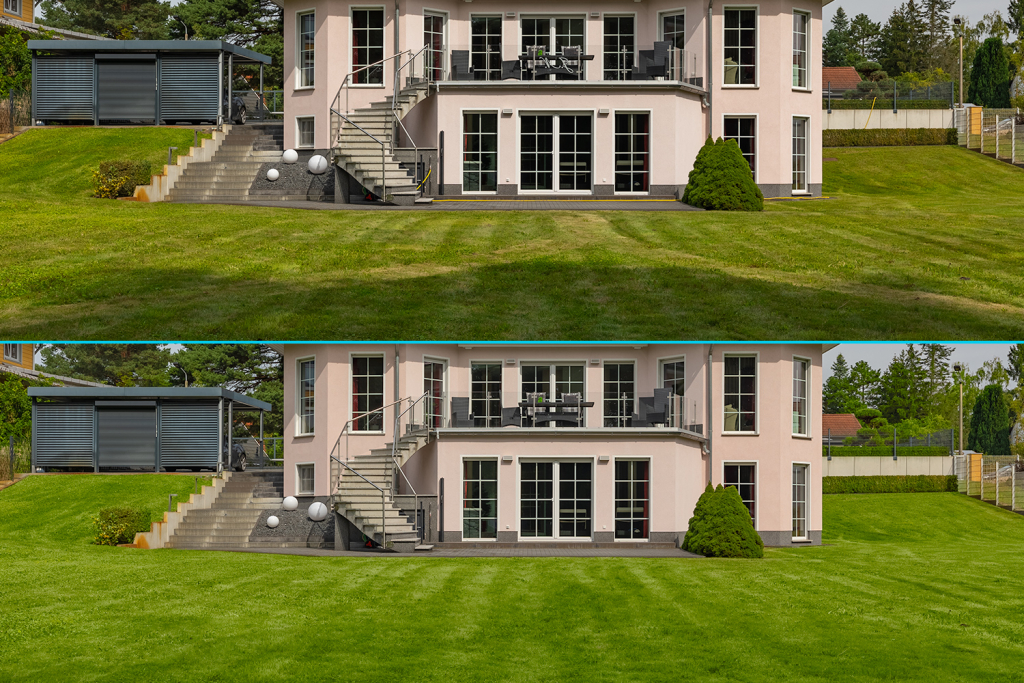
Special effect brushes can also be used with the Clone Stamp tool to better integrate the copied pixels into the surrounding area. An example of using a leaf brush can be found in our article.
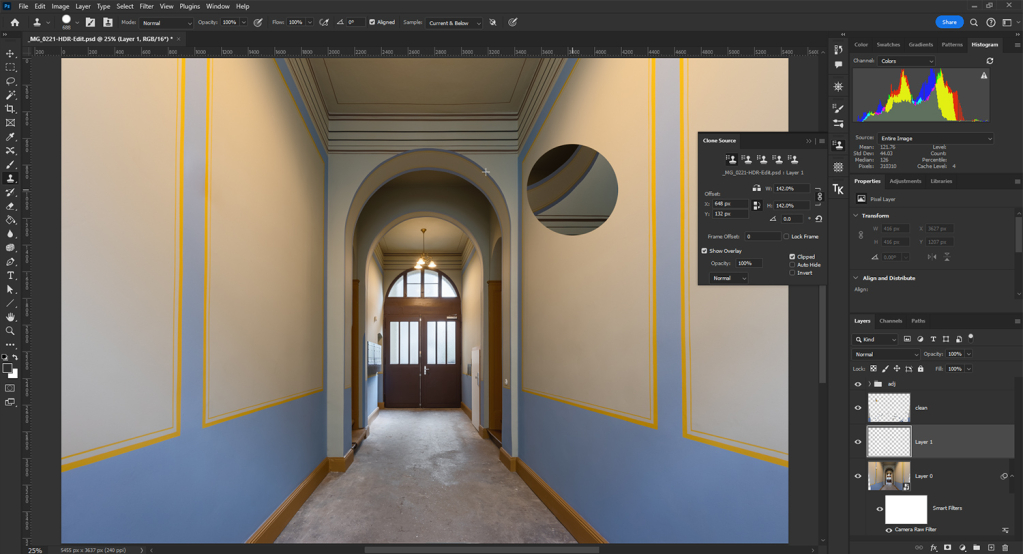
The Clone Source panel can be found under Window > Clone Source. It enables the setup of the source point of the cloning process, by controlling its scale, offset and rotation parameters. This is very useful for very detailed work without making the edits too obvious, such as edge restoration or patterns that follow perspective.
Healing Brush
The Healing Brush enables the fast and easy removal of spots, straight lines, or small elements. It allows the user to sample any area from the Current Layer, Current & Below or All Layers. Unlike the Clone Stamp tool, it manages to blend the texture, colors and luminosity of the sampled pixels with the adjacent area.
The Healing Brush and Patch Tool have a Diffusion value, which controls how the tool blends the copied pixels with the surrounding area: the higher the value the wider the blending spreads, opposite to the Hardness setting of a conventional brush.
It is ideal for element removal, image extension, texture preservation, pattern disruption and general refinements. Like the Clone Stamp tool, the sample area can be modified using the Clone Source panel.
Using it with blending modes (setting the brush on Lighten to remove dark specks or Darken to erase bright points) diminishes its ability to influence texture. Sometimes, the results have very sharp, obvious edges. These can be removed by switching to the Normal blending mode and refining or by using the Clone Stamp tool for additional touch-ups.
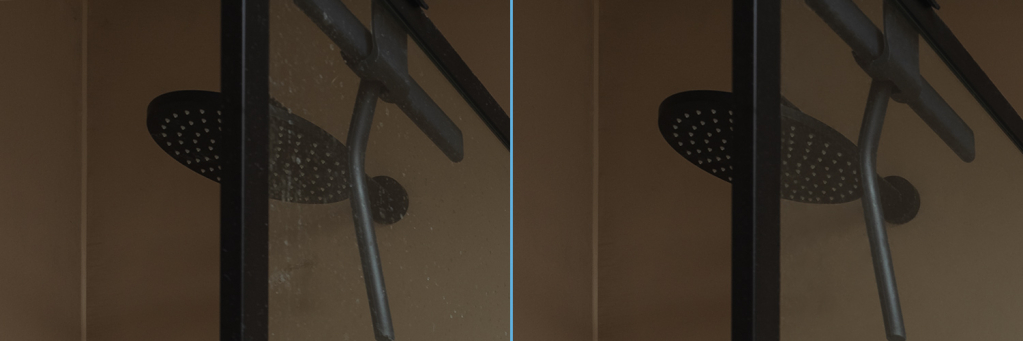
There is also the Spot Healing Brush, which automatically chooses the sample point and does so from either the Current Layer or All Layers. It should be used carefully as it may excessively smudge or blur an area.
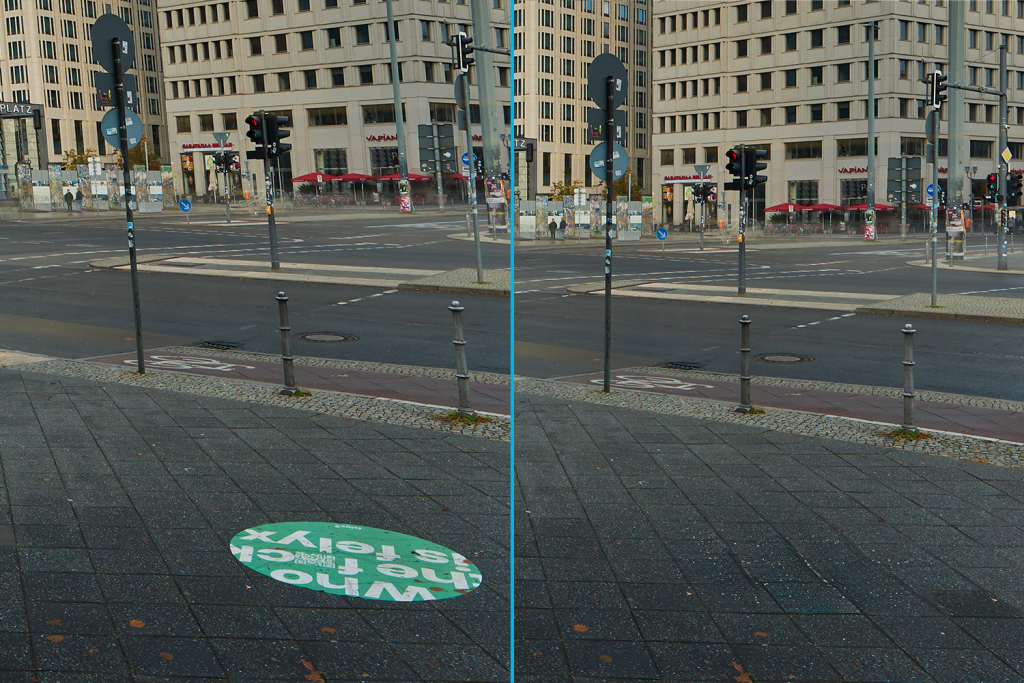
A similar tool to the Spot Healing Brush is the Remove Tool, which automatically samples either from the Current Layer or All Layers. It provides better results in terms of texture retention but sometimes introduces color artifacts around the edges.
Fade
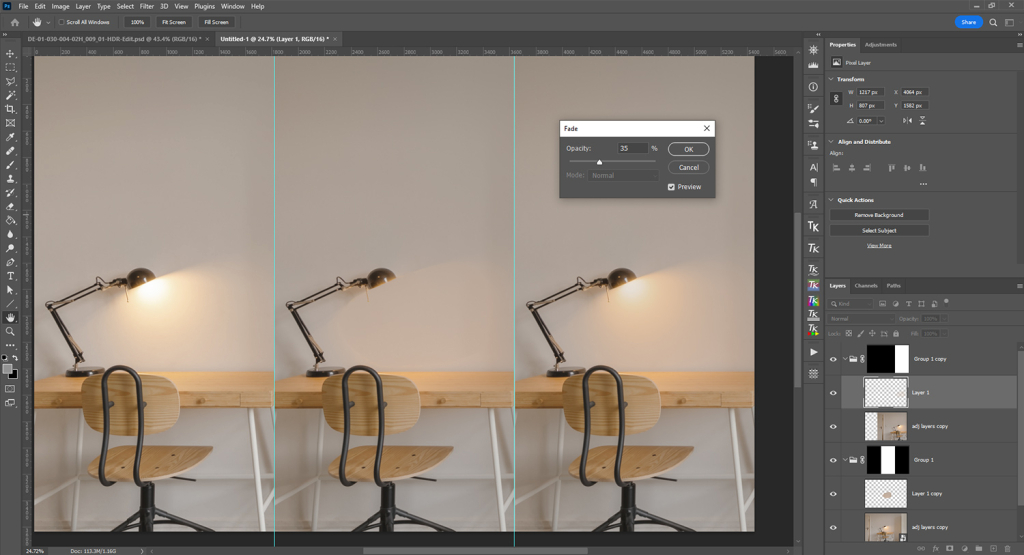
By accessing Edit > Fade or using the shortcuts Ctrl+Shift+F on Windows, Cmd+Shift+F on Mac immediately after using most removal tools (except the Remove Tool), better control of the last used tool is offered.
This allows to adjust the opacity and blending mode of the effect, giving a finer control over the final result and helping to achieve a more seamless integration.
It’s important to note that the Fade option only works on the last adjustment made. Any further use of tools or filters will make previous adjustments inaccessible.
Frequency separation
While not part of Adobe’s suite of tools, frequency separation is a powerful technique for object removal in difficult situations. It separates the color information (low frequency) from the texture (high frequency), enabling a flexible workflow for color repair and texture replacement.
The most popular use for frequency separation is skin retouching, but it can also be applied in architectural photography. Frequency separation enables the replacement of texture to eliminate problematic areas and the blending or replacement of color to change the colors in those areas.
Photoshop does not have a specific function to create the required layers, but it’s easy to set them up once and then create an action. It’s advisable to remove as many objects as possible before implementing frequency separation to ensure ample sampling space.
After image cleanup, create a base layer (usually by stamping visible on a new layer using Ctrl+Shift+Alt+E on Windows or Cmd+Shift+Opt+E on Mac). Duplicate this base layer twice and rename the copies to avoid confusion. The layer above the base layer should be designated for color (low frequency), and the upper copy should be designated for texture (high frequency).
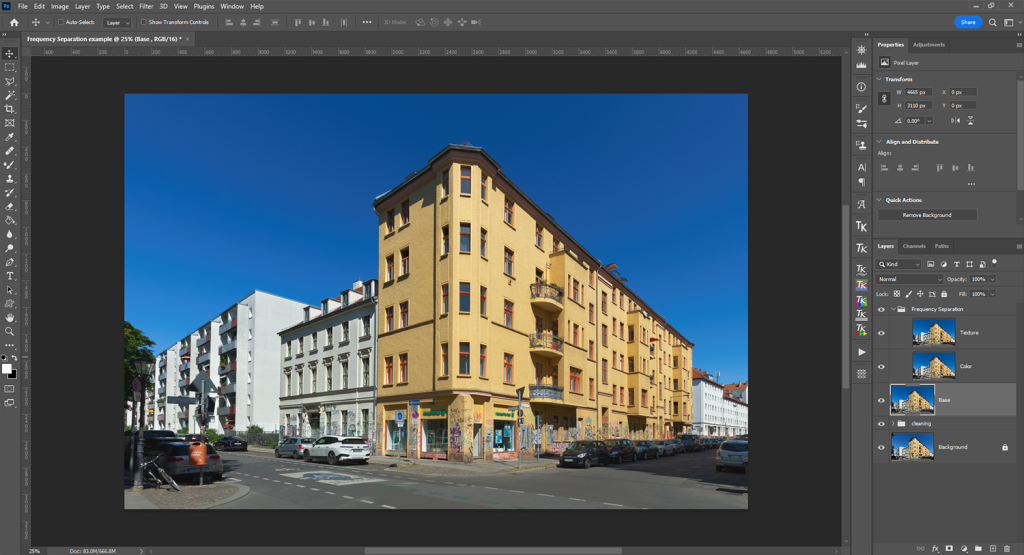
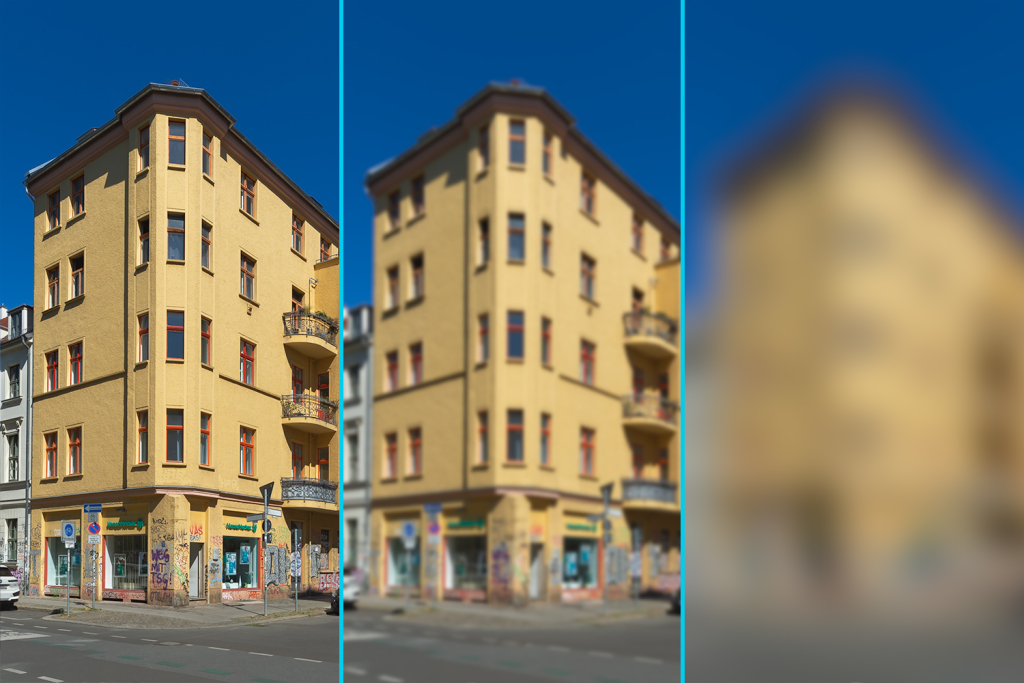
A Gaussian Blur filter needs to be applied to the color layer to eliminate texture. The filter value varies depending on the image resolution; it should blur the image enough to remove details without creating color blotches. If the layer is too blurry, the final result will have a noticeable brightness difference compared to the base layer.
However, in some cases, blurring the color layer too diffusely (resembling the third example below), might make the repairs easier by having to work exclusively on the texture layer.
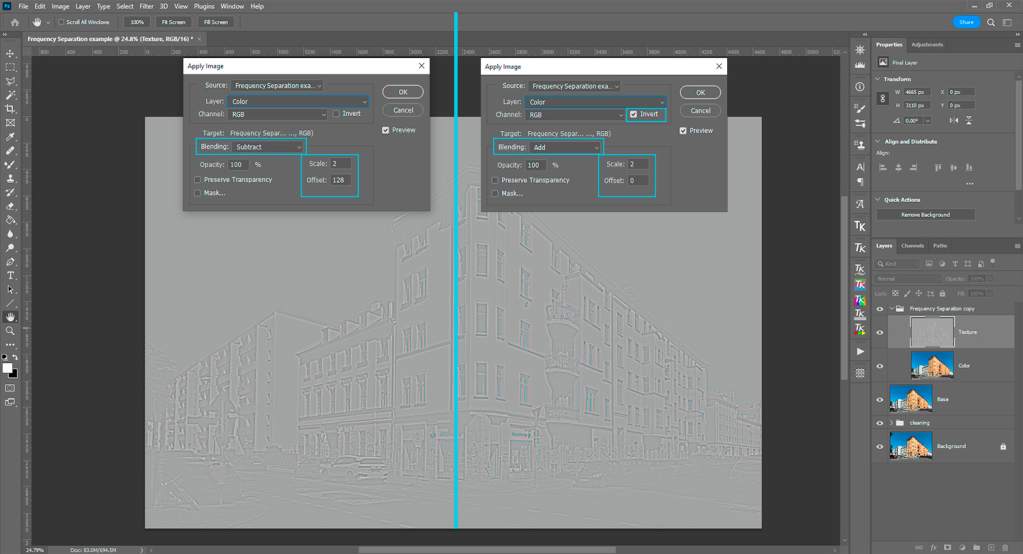
On the texture layer, click on Image > Apply Image. In the Layer section, select the Color layer. For 8-bit images, set the Blending mode to Subtract and enter these values: 2 in the Scale box and 128 in the Offset box. For 16-bit images, set the Blending mode to Add, check the Invert option, and insert 2 in the Scale box, leaving the Offset box at 0. After applying these settings, change the layer’s blending mode to Linear Light.
After grouping the color and texture layers, there shouldn’t be any difference in sharpness and brightness between the base layer and the frequency separation group. If the color layer needs to be replaced due to the Gaussian Blur settings, the texture layer must also be recreated.
To maintain a non-destructive workflow, perform color correction on an empty layer between the two frequency layers. To adjust textures, create a duplicated texture layer (set to Normal blending mode and clipped to the original). Each tool used on the duplicated texture layer should sample from the Current Layer only, while tools used on the empty layer for color should sample from Current & Below.
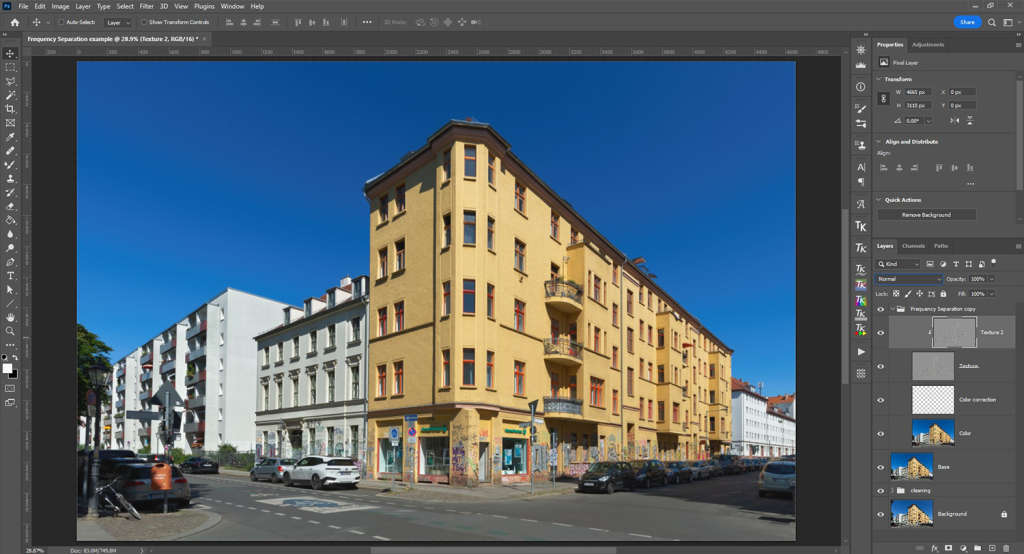
As a quick tip, using a Mixer Brush on the empty layer between the frequencies blends colors easily. It needs to be set to Sample All Layers and by adjusting its parameters, it can help with creating smooth surfaces. The Clean the brush after each stroke option needs to be active.
The important parameters for the Mixer Brush are: Wetness – higher settings result in longer paint streaks, Load – at low load rates, paint strokes dry faster, Mix – determines the ratio between the colors at the start and end of the stroke, and Flow – controls the rate at which paint is applied as you move the brush.
Since mixing colors can remove shadows and highlights, it’s ideal to work on multiple layers with accurate feathering. This allows for repainting highlights and shadows using the original colors with a soft Brush tool.
