Everyone who has worked in Photoshop knows there are multiple ways to achieve the same result. Each step taken, each tool chosen, and each adjustment made is entirely up to the retoucher and their experience, as there are no right or wrong methods.
I choose to work non-destructively, which allows me to change anything in the layers I have already created instead of adding more layers above the original result or having to retrace steps in case of mistakes. This approach enables me to quickly and effectively adjust the image based on feedback.
Table of contents
Cleaning layer
Cleaning on an empty layer placed above the background or composite image allows me to mask out items without worrying about leaving marks or blended pixels from using the Healing Brush or Clone Stamp. Keeping repairs on an empty layer makes them easier to spot and reduces the overall Photoshop file size. The key here is to lock the position of the layer to avoid misalignment during detailed retouching.
It’s important to note that Clone Stamps with low opacity and the Healing Brush don’t work well together on empty layers. Cloning and healing should be done on separate layers and merged into a single designated cleaning layer once finished.
In contrast, retouching on a duplicated background or stamped visible layer allows the additional use of the Patch Tool, which only works on rasterized layers and lacks sampling options. This approach can increase the .psd file size and make it easy to miss previously altered areas when masking out revised removals.
Cloning and healing
Sometimes Content Aware Fill or Generative AI fails to properly remove objects or fill spaces, resulting in mixed patterns, no texture, or misaligned elements. If the result is somewhat decent, I correct its errors while using it as a background for my removals. If the generated result is unusable, I copy a pattern from a similar area and duplicate it until the unwanted spot is entirely covered.
If the object I’m trying to remove is at the edge of the image or if I can sample a nearby area almost as big as the object, I turn the sample into a Smart Object. Then, I stretch the sampled area to cover the unwanted object without damaging the pixels too much or drawing attention to the spot. Once the result is acceptable and blended, the layer can be rasterized to avoid unnecessarily increasing the .psd file size.
In cases where the previous method isn’t effective (sample area too small, stretched pixels etc.), I copy and reposition the sample using Clone Source settings. This includes adding angle variation, mirroring, or enlarging the stamp size until it covers the unwanted object. I blend the copies with masks as needed.
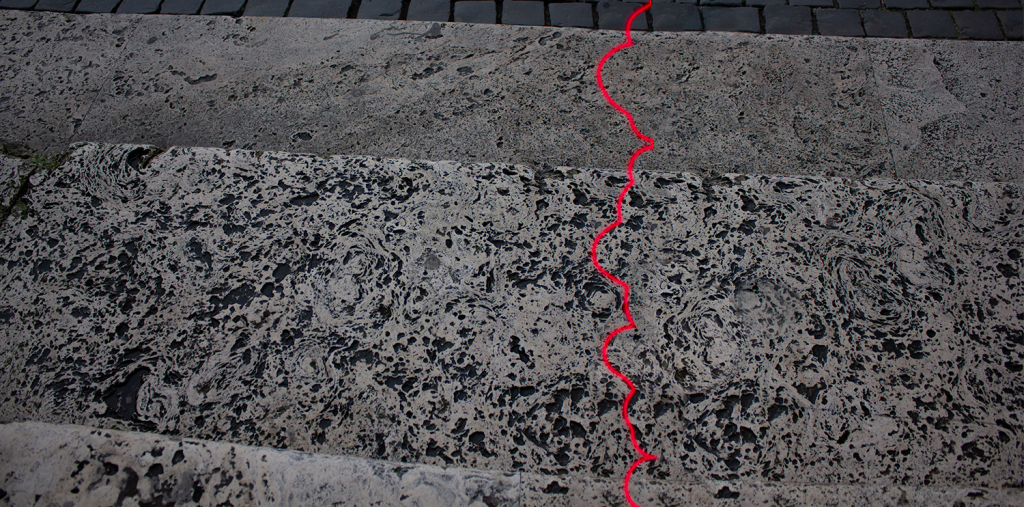
To address repeated patterns, I use the Healing Brush in Lighten (for dark elements) or Darken (for bright parts) blending mode to disrupt the pattern and create a new motif. If this method leaves rigid pixels, I refine them with the Healing Brush in Normal mode or multiple strokes of the Clone Stamp with low opacity.
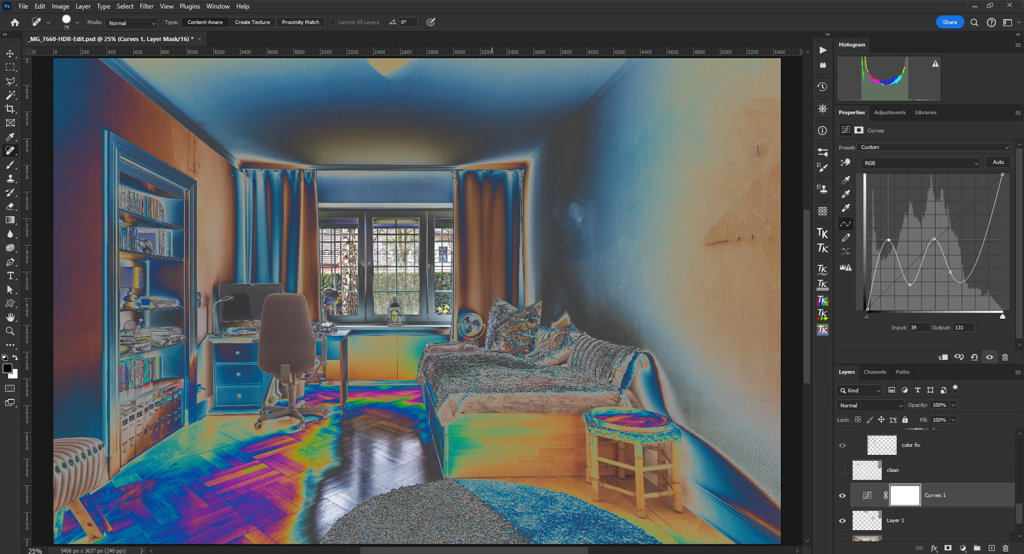
To ensure no dust spots, smears, or inconsistencies are missed, I use a funky Curves adjustment layer in which I create a wave structure along the Curves area. While these errors may not be immediately noticeable, they can become apparent later, either during further processing, or publishing, so it’s best to correct them early.
Masks, channels and paths
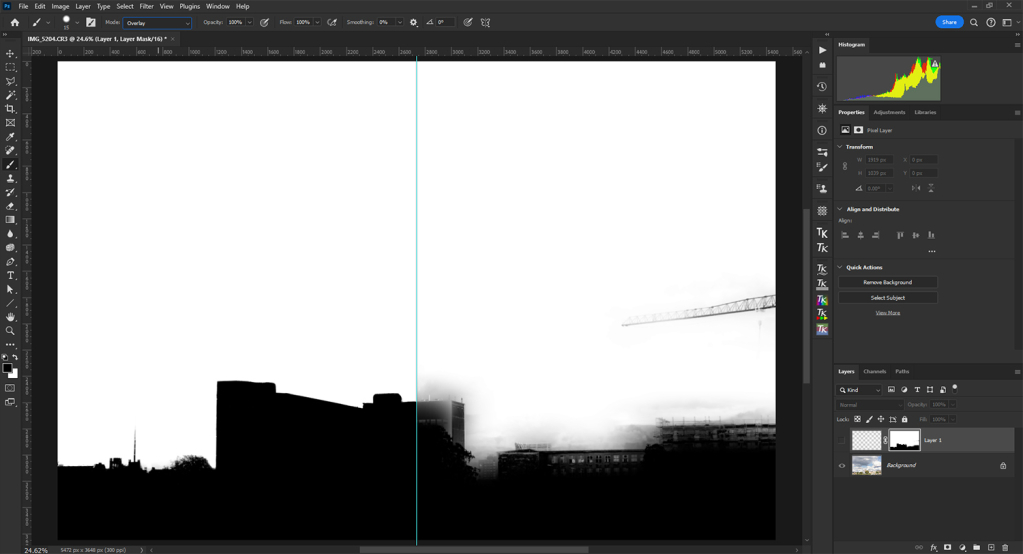
The Channels panel in Photoshop provides various methods to create masks by saving selections as channels, duplicating existing RGB channels, or manipulating luminosity masks. In masking, white reveals the element while black conceals it, so effective masks are typically high contrast. Adjustments like Levels or Curves can enhance contrast inside masks, refining what is revealed or concealed. For precise masking, such as isolating the sky without affecting buildings, using black and white brushes on Overlay blending mode allows for quick and accurate exclusion.
The Pen Tool is a precise method for creating and saving selections in Photoshop projects, especially for outlining curved areas with unmatched accuracy. Each path created with the Pen Tool can be saved on its own layer within the Paths panel, which is crucial for compiling selections, creating masks, or making shape and position adjustments within a photograph.
In addition to using adjustment layers, brushes, or gradients on Overlay blending modes, the Blur and Sharpen tools can also refine mask feathering. For instance, if different levels of smoothness are needed within a single mask due to focal planes, brushing with the Blur tool at a low strength over the areas where black and white meet will soften and feather the edges.
Masks, channels and paths can be adjusted to replicate perspective corrections, element repositioning, or shape alterations by activating each channel, mask, or path and applying the Last Filter (found as the first option of the Filters drop-down menu or using the Ctrl+Alt+F shortcut on Windows or Cmd+Opt+F on Mac) immediately after making changes. This method eliminates the need to recreate them.
To optimize the Photoshop file size, it’s advisable to remove any unused or unnecessary channels and paths, especially if all necessary masks are already in place, rendering the paths redundant.
I find it better to start with sharp masks (containing strictly black and white), delineating every necessary element, with feathering and refining the masks being the last step, as overlapping masks with feathered edges create halos or outlines. Select and Mask is a panel that allows for the precise parametric control of complex masks and I would only recommend using it in the last step of the masking workflow, because it’s destructive. Once a parameter is set and saved, it can’t be changed to its previous state.
Quick tips
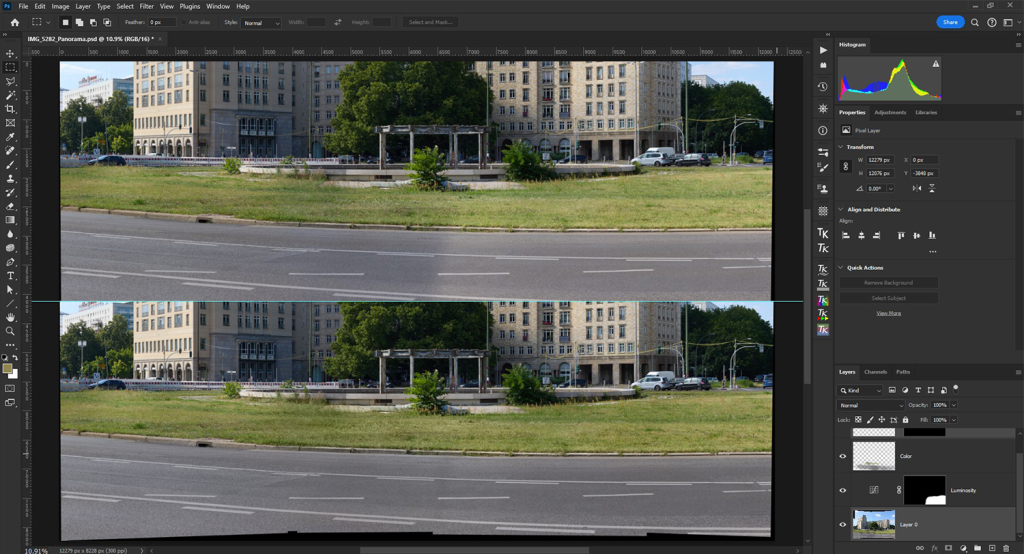
When part of a panorama has areas with significant differences in light and color compared to the rest of the image, the issue can be addressed in just two layers. First, use a Curves or Levels adjustment layer set to Luminosity blending mode and manually mask it over the area needing light correction. Second, create an empty layer set to Color blending mode and paint over it at low opacity with colors sampled from similar elements in the rest of the image to correct the color.
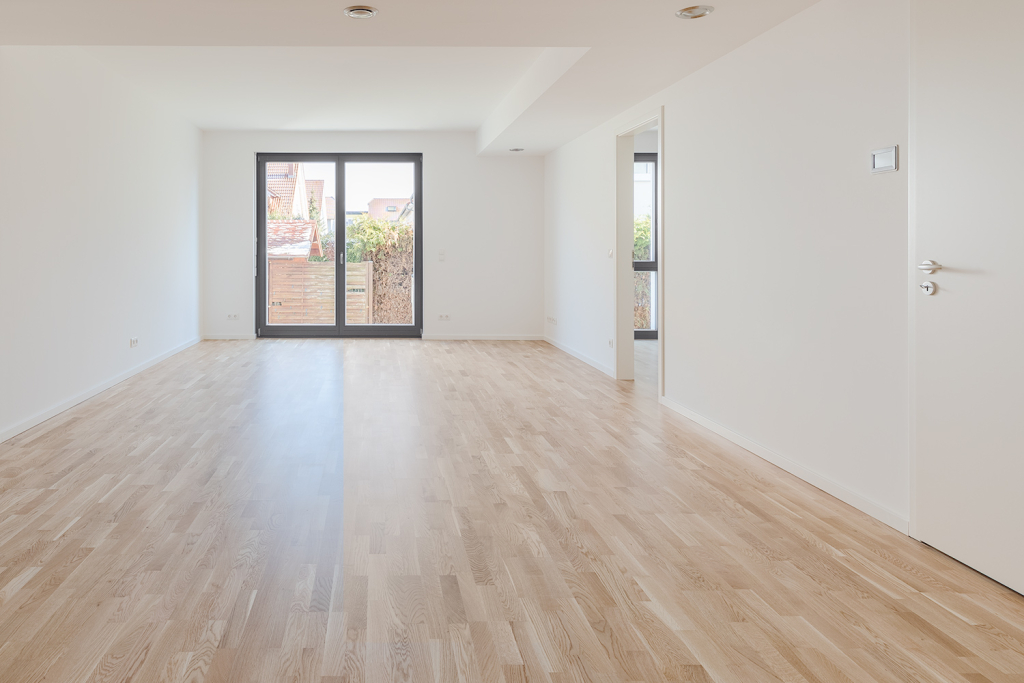
To remove a color cast in an interior image, lightly paint the correct color on a layer set to Color blending mode. If the color cast is on a wooden floor, use a Gradient Map layer at low opacity on Overlay or Soft Light blending mode with colors sampled from unaffected areas of the floor.
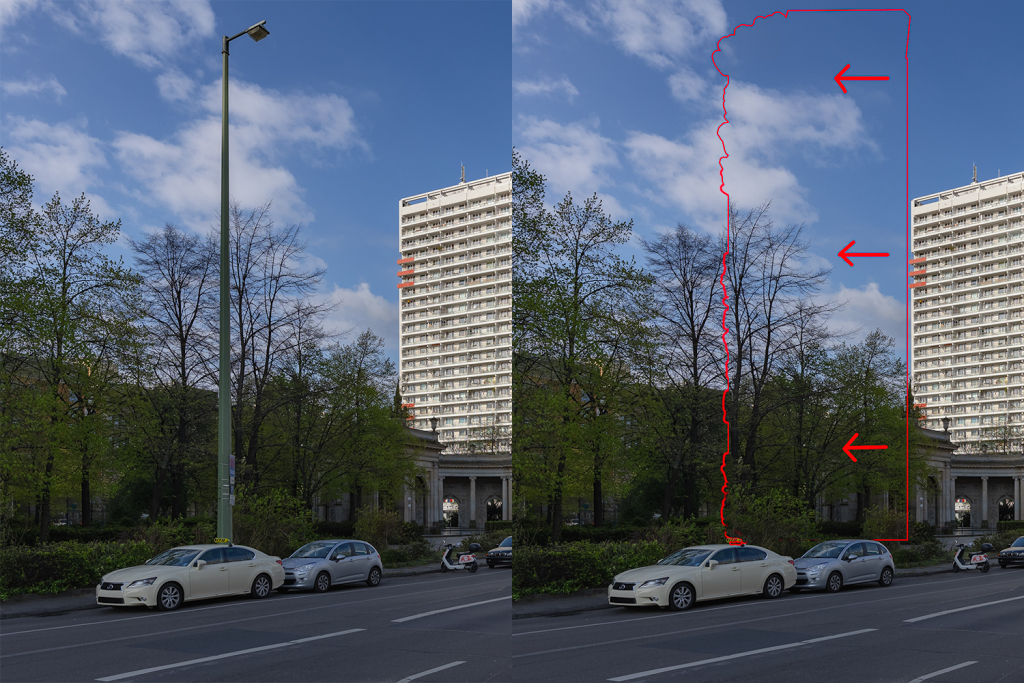
Using the Spot Healing Brush in a straight line to remove a cable, pole, or string will remove the object but may leave a smeared stroke. If the line goes over a solid background, it’s best to further refine it with the Healing Brush or Patch Tool. If the line passes through foliage or busy backgrounds, use the Special Effects Brushes (modifying Shape Dynamics and Scattering settings) on the Clone Stamp tool to make the smudge less noticeable.

Before exporting an image from Photoshop, always Stamp Visible (Ctrl+Alt+Shift+E on Windows, Cmd+Opt+Shift+E on Mac) or Flatten Image (but don’t forget undoing before saving the final version of the project). This will eliminate any risk of Photoshop adding artifacts, halos, bending or unwanted alterations to the final result. This step can be skipped if the photo is exported from other software, such as Capture One, Lightroom or Bridge, as these programs don’t interpret Photoshop’s layer structure.