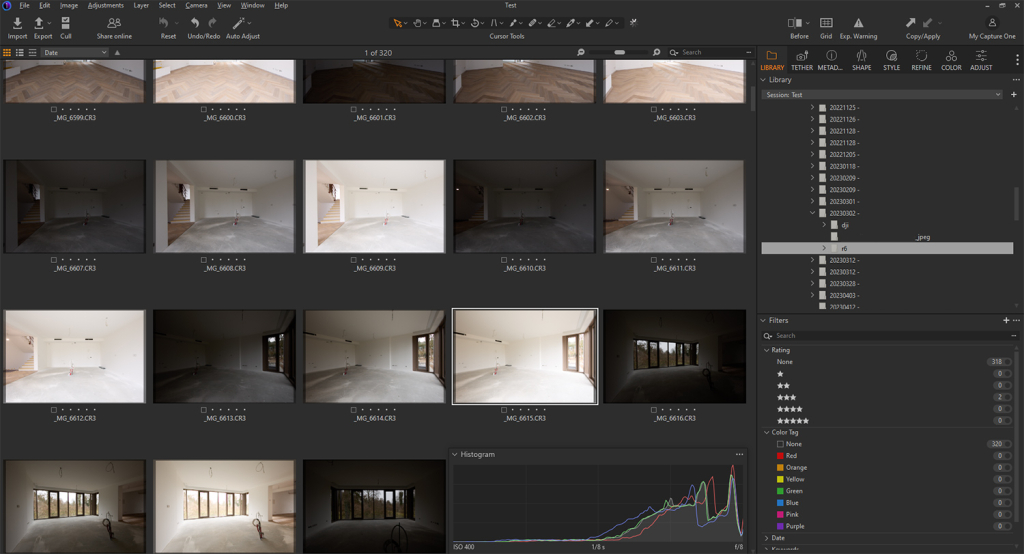
As a photo editing software, Capture One offers a complex environment for photography management and enables an adaptive workflow through its panels and tools. Almost every user interface element can be moved, either as floating elements or between tabs, allowing you to adapt any workflow to your preference.
When working in a multi-user environment it is best for all users to use the same software version, as adjustments made in a newer version will not be compatible on older versions.
Table of contents
Catalogs and sessions
Capture One introduces two methods of project management: catalogs and sessions. You can read more about the difference between catalogs and sessions in our separate article, but in summary sessions are more suitable for short photography projects or tethered shootings, while catalogs are best used for complex, extensive projects.
They are created from the File menu and you are able to use templates if you want to use predefined folder layouts instead of starting from a blank structure. The templates are created from existing catalogs or sessions from the File menu or imported from other users.
Sessions can be imported into catalogs, either by copying or adding, just like usual image files. If the copy option is selected, the element will be copied into the internal catalog structure, while adding will leave the files at their original location. Importing catalogs into sessions is not possible.
Both can be easily moved between users, as long as the original folder structure is preserved. Catalogs have their adjustments and preview cache in the root folder, alongside an Originals folder if images are copied. Sessions contain their adjustments and cache in a CaptureOne folder inside the Capture folder. Moving the Settings153 folder (sessions) or Adjustments folder (catalogs) between users is possible, as long as they have access to the same catalog or session. By doing so, settings and adjustments will be overwritten in the destination session or catalog.
EIP
EIP (Enhanced Image Package) is a proprietary file format from Capture One and can only be used on RAW files. When working with complex edits and you want to move individual images and their adjustments between sessions, catalogs or file locations, packing the image as an EIP will preserve all settings.
Packing and unpacking a file is done by right-clicking an image in the Library tab or Viewer window and selecting the corresponding option.
Importing and tethering
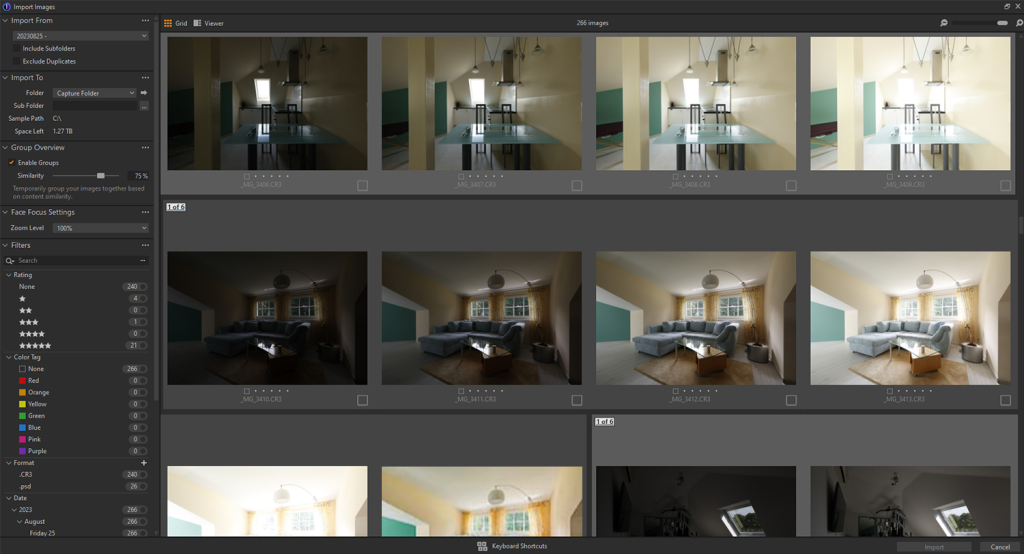
In a session, click the Import button to open a window which enables you to select where to import from and to. Additional options are available, such as including subfolders, excluding image duplicates, grouping (highlights batch images), filters and renaming. You are also able to rate and color label images before actually importing them.

By dragging and dropping an image, the folder of the image location opens in the Library tab and a CaptureOne folder is created inside it (the same as the ones that store all adjustment information and cache in a regular session), which allows you to edit images without importing them. You can also navigate to any folder, including the Capture folder of any session, using the System Folder navigation and view or modify any compatible image. Additionally, you can also import images from any folder using this navigator, by right-clicking the folder and selecting Import > From selected folder… .

When a session or catalog is open, connecting external media automatically opens the Import window.
When attaching a compatible camera (most manufacturers and models are supported) while Capture One is open, you are able to trigger the camera from the Tether tab. Depending on the camera model, you are able to activate Live View and control the exposure, camera and focus settings directly from Capture One. By default, images will be saved in the Capture folder of the session, but the location and image naming can be changed. Various other parameters for facilitating image management are also available.
Organizing
After importing, you are able to quickly organize your images through a star rating and color label system.
Use variants if you want different edited versions of the same image. These can be created by right-clicking an image and selecting New/Clone Variant. New Variant will create a virtual copy of the image without any applied adjustments, while Clone Variant will create a virtual copy with all adjustments applied up to that point. Their adjustments are applied to the original file metadata and are only visible inside Capture One. Deleting a variant will not move it to the Trash folder.
In the Metadata tab, you can view relevant exposure information, modify the capture time of the image and add relevant IPTC information. For better organization, you can also use keywords when working on an extensive library. All fields in this tab have auto-complete enabled and can suggest previously used values.
The Annotations tool can also be found in the Metadata tab and is useful for drawing and highlighting future correction requests. By default, the view of annotations can be enabled or disabled using the J key.
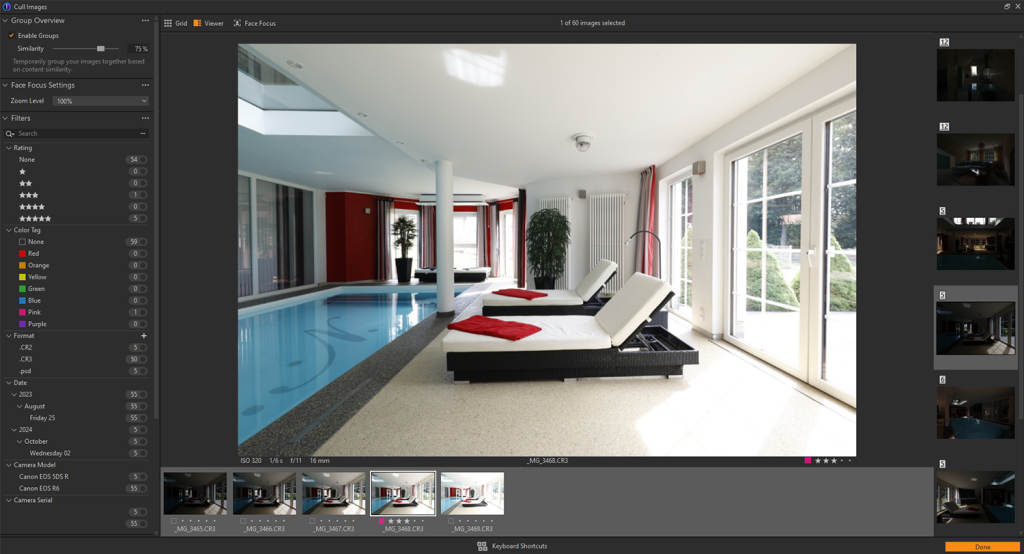
Using the Cull tool (found by default in the upper-right corner next to the Import and Export buttons) you are able to quickly preview and group similar images in your library. It is best used to check if images are in focus and highlight candidate images for selection. Another method to preview focus areas outside the Cull tool is by activating the Focus Mask from the View menu, which will highlight the sharpest parts of all images.

Tools
Capture One offers completely non-destructive editing, that means any adjustment made during any stage can be modified or reset. Double-clicking any tool slider will reset it to its default position (curve points need to be dragged out of frame to be removed).
Any tool that features a hamburger icon (three horizontal lines) in the upper-right corner of the tool panel will offer the option to save any adjustment as a preset. Any tool that features a wand icon in the upper-right corner can apply automatic adjustments. The Copy and Apply button (diagonal double-headed arrow) will allow the transfer of any adjustment between selected images. The Reset button (arrow curving to the left) in the tool panel will reset any adjustment and by alt-clicking (Option+click on Mac) adjustments will only be temporarily reset to preview any changes. The three dots open a menu where you can set new default values for the current camera, apply already defined default values, reposition and find online help.
Using the Copy and Apply buttons in the upper-right part of the user interface will copy all adjustments (including layers, masks and styles) from an image and apply them to other images without having them preselected. Using the dropdown arrow will let you choose which adjustments will be applied. This Apply button will also apply any individual adjustment copied via the Copy and Apply buttons from the tool panel.
Shaping and refining
By default, Capture One detects the camera model and lens used, applying the lens profile in the Shape tab. It automatically removes chromatic aberrations in most cases. If corrections are not applied, click the three dots next to the Chromatic Aberration checkbox and select Analyze to update the result.
It is not possible to manually import lens profiles. If you are working with an unsupported lens (from Capture One or the manufacturer) you will need to manually adjust distortion and light falloffs using a generic profile.
Cropping can be done from the Shape tab as well, using predefined, user-defined or unconstrained aspect ratios. AI Crop is best used in a studio environment and will enable automatic cropping based on a reference image. Keystone enables digital perspective correction, but if the result is inadequate using the Auto settings, it is best to use different software, such as Adobe Camera RAW, to manually adjust the perspective. In Capture One, the keystone control points are interlinked, which can make precise alignment difficult.
The LCC tool is mostly used for technical cameras and can remove color casts and repair illumination falloffs.
Sharpening is applied automatically based on the camera model and can be controlled in the Refine tab. The Focus window will provide a better view of adjustments and will zoom by default on any eyes or faces it detects in a scene.
Noise reduction can also be controlled from the Refine Tab and by adjusting the Single Pixel slider any stuck, hot or dead pixels will be automatically removed.
Removing moiré patterns caused by fine, repetitive details can also be attempted in this tab using the sliders from the Moire tool. It is best to apply these adjustments on a separate layer where the patterns causing these issues are isolated using a mask.
Dust stuck on the sensor surface can be digitally removed using the Dust Removal tool, either by manually selecting dust elements or automatically, by clicking the wand icon in the upper-right corner of the tool panel.
Exposure
Activating the Exposure Warning button in the upper-right corner of the user interface will highlight any areas that are over- or underexposed.
Using the tools in the Adjust tab, you are able to control the overall brightness and contrast of the image. Besides sliders for exposure, contrast, and saturation, high dynamic range options are also available.
In the Levels tool, the output points are located at the top, while the input points are positioned beneath the histogram. The left side of the histogram represents the shadows and the right side represents the highlights. The output points control the maximum light values in the image, while the input points control the amount of luminosity values. Sliding the middle point controls the balance between shadows and highlights, effectively changing the overall contrast of the image.
Color
When working with RAW files in Capture One, color space is not a concern. Upon import, the files receive an automatic ICC profile based on the camera model. The visual output in the Viewer is determined by the Proof Profile in the View menu, allowing you to select any color space for previewing and proofing, which is useful for printing and publishing. A conventional color space is assigned only on export.
Tools in the Color tab offer complex and precise methods for working with the color values of an image. Different curves are available under Base Characteristics which enable different tonal properties.
Picking a color in the Advanced tab of the Color Editor tool will allow you to accurately select (by dragging the area of the selected triangle) and adjust the values of any color range. By activating the View Selected Color Range checkbox, you are able to see the affected areas in the image.
The Normalize tool enables a quick white balance and exposure correction between images, by using a reference sample and applying the color and brightness values to target images. For best results, it is recommended to use images taken under similar lighting conditions.
Layers and masks
Working with layers in Capture One is enabled by default in the Refine, Color, and Adjust panels. This feature supports a structured workflow, allowing for stacking effects and greater control over adjustments. Layer order is not as important as in other photo editing software (except for heal and clone layers), as Capture One applies adjustments cumulatively.
The base image layer is called Image Layer (Background in older versions) and by default adding a layer using the + icon will add an empty adjustment layer. Empty layers have no masking information, meaning that any adjustment done on an empty layer will not be visible and adding masks is required.
By selecting New Filled Adjustment Layer from the dropdown menu next to the + icon, a filled layer will be created which covers the entire image with a 100% opacity mask. Any adjustment done on the base image layer will be transferred to a new filled layer when selecting the Move Image Layer Adjustments to New Layer option. Clone and heal layers are automatically created the first time you use these tools. Any subsequent use of the Clone and Heal tools will apply adjustments to the original clone and heal layers.
Double-clicking a layer will rename it, right-clicking will open a contextual menu which allows you to invert, feather, refine and constrain layer masks. Layer opacity is adjusted using a slider located at the bottom of the Layers tool.
You can read more about masking in Capture One in our separate extensive article, but in summary using the masking tools will help make refined selections. Masks are not visible in the layer window as thumbnails and can only be displayed in the Viewer. The default key for toggling the visibility of masks in the Viewer is M. Mask color and opacity can be adjusted by accessing Edit > Preferences, in the Appearance tab.
Masks can be created using tools in the upper-right part of the Layers tool, which include brushes, gradients and AI selection methods. Right-clicking with an active brush tool on the Viewer window will open a floating window that allows brush parameter modifications. Alt-clicking with an active brush tool temporarily switches the brush to an eraser as long as the key is pressed.
Exporting
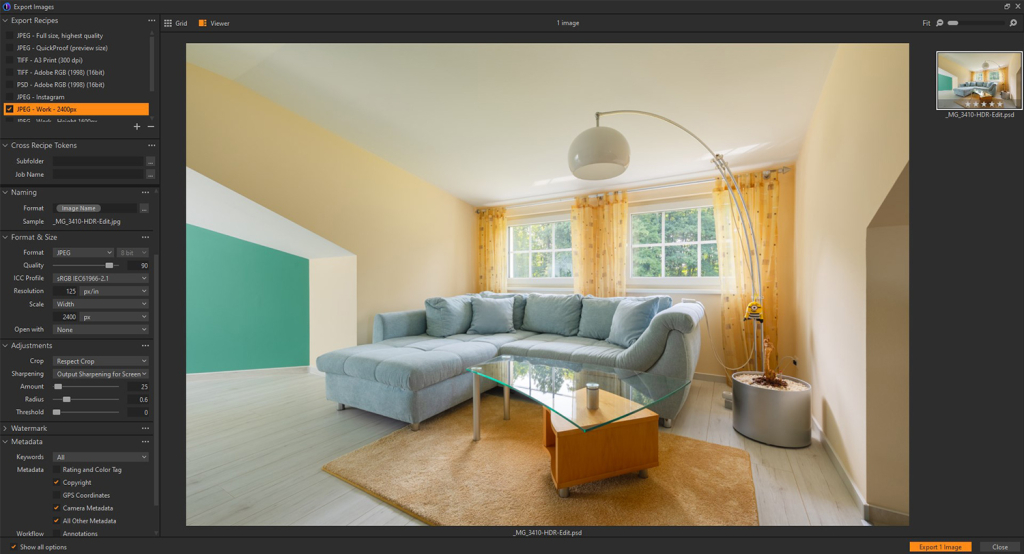
You can export images by selecting them and accessing the Export panel in the upper-left corner of the user interface. A new window opens where you can preview your selection and also the image output. Exporting in Capture One is controlled by recipes, which can be best described as export presets. Besides the default ones, you can create your own recipes, for which you can select a large number of export parameters, such as export location, format, size, color space, watermark and metadata inclusion.

You can also export images directly to third-party applications (such as Photoshop) without creating intermediary files, by right-clicking an image, selecting Edit With and choosing the desired application. Capture One will then transfer the image directly, allowing you to start editing in the other software immediately, without manually saving and importing files.