Exterior photography can present interesting challenges, such as perspective distortion when buildings are in close proximity to a wide angle lens or having distracting elements in the foreground of subjects.
Table of contents
By using panoramas for exterior images, buildings can be represented on a larger scale with an increased level of detail, while minimizing perspective errors. This method also works for really expansive interiors. Attempting to implement this method with wide-angle lenses close to the subject will result in perspective errors and significant distortions.
Tools required for this approach are:
- a camera
- a midrange zoom lens
- a monopod (can be replaced with a tripod if there isn’t enough light)
The use of a monopod is optional and only comes in play to prevent unintentional tilting or panning errors by the photographer. Dedicated panorama tripod heads aren’t needed because nodal points aren’t a factor in this case, as they are only useful for panoramas that include close foreground elements that would prevent the creation of seamless stitching.
This technique isn’t a universal solution to the representation of buildings, nor should it be confused with taking panoramic images using shift lenses. While it may be relevant for web or magazine publishing, its use case scenario is optimal when it comes to large scale printing and only works if there is enough available distance between the camera and the subject. This approach also enhances the ability to make more precise selections and have greater control over exposure values.
For the following example, a 20-megapixel camera was used to illustrate the technique by taking pictures of the aptly-nicknamed Panorama building on the Karl-Marx boulevard in Berlin. The distance between the camera and the building was 170 meters, and the focal lengths used were 35mm, 50mm, and 85mm. Unfortunately, the individual frames lack lighting and color consistency, as they were taken at irregular intervals due to heavy traffic and fast-moving clouds in front of the sun. All resulting panoramas were minimally retouched to normalize the white balance and exposure values, while the individual panorama frames and the first reference image at 35mm were not edited at all.
The first image is a single image of the building, taken at 35mm.

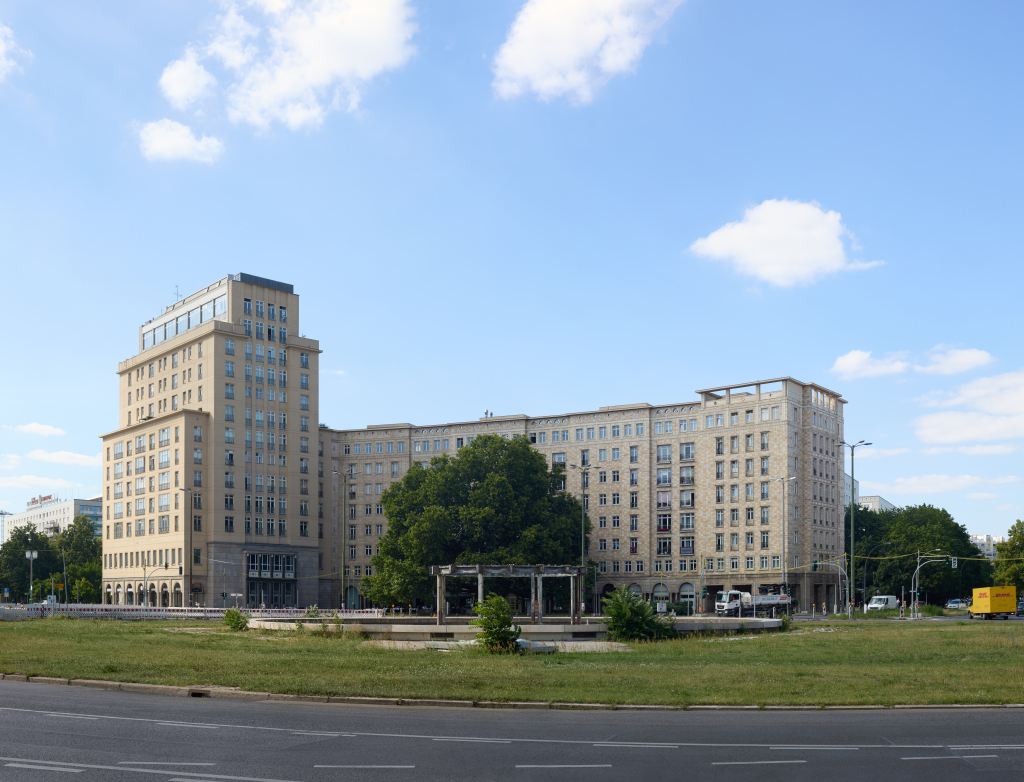
The first set of images for panorama stitching was taken at 50mm. The difference in lighting conditions between the first and last frame is apparent.
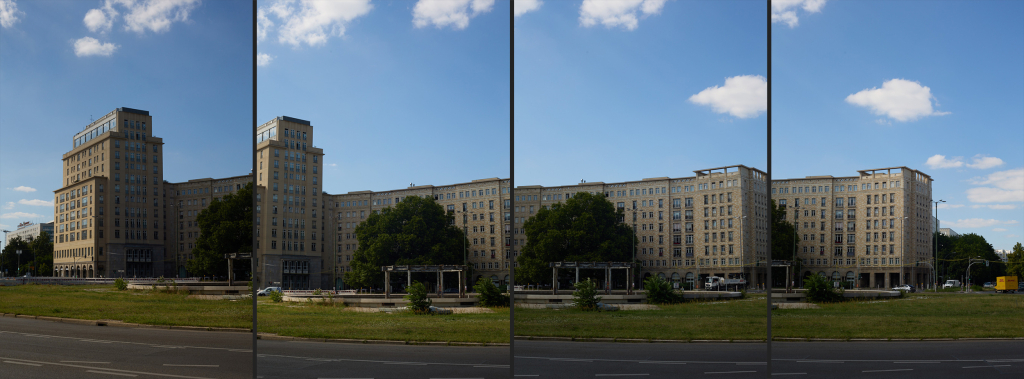
Even though the inconsistency between frames is visible, the panorama engine managed to maintain constant light levels and color tones across the frame.
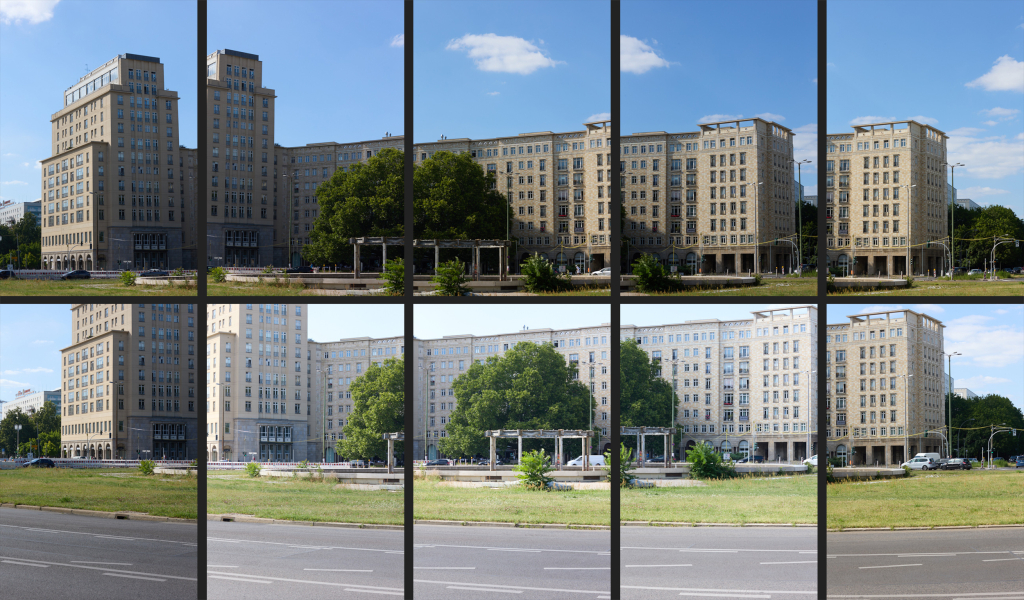
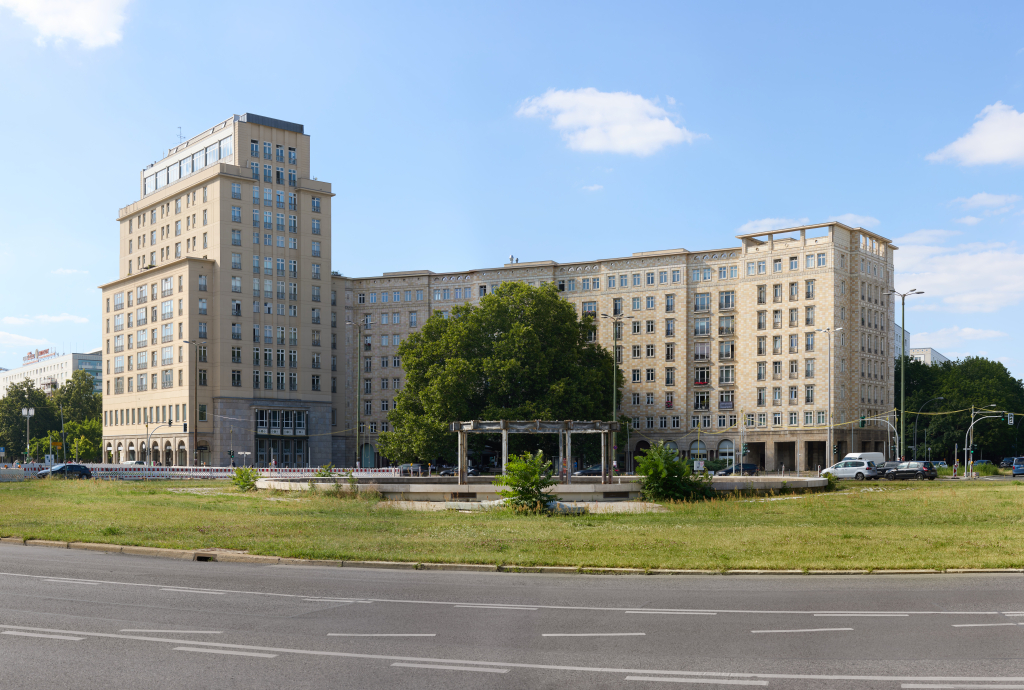
The second set of images for panorama stitching were taken at 85mm. Here, the inconsistency between frames is more drastic, which resulted in a small light strip across the bottom of the final image, that thankfully wasn’t that hard to clean up.
The quick method used for cleaning can be found in our article about advanced tips for Photoshop.
The resulting image is a massive file free of perspective errors.
This approach gives the photographer the freedom to compose highly detailed images that effectively represent buildings within their context, including the adjacent environment and surroundings. By using various focal lengths and stitching multiple frames together, the technique allows for capturing a broader scene that encompasses not only the architectural details of the building but also its interaction with the surrounding landscape and urban elements.